In my last post, I shared about the installation of the wood casing, walls and trim in the sunroom at The Shack. That means today we can focus on that wood ceiling.
You may recall that the original ceiling was covered in a plastic faux beadboard. I was very happy to see it gone!

We removed the plastic faux beadboard ceiling in the sunroom. The original insulation was also replaced once the repairs were made to eliminate water damage around the doors.
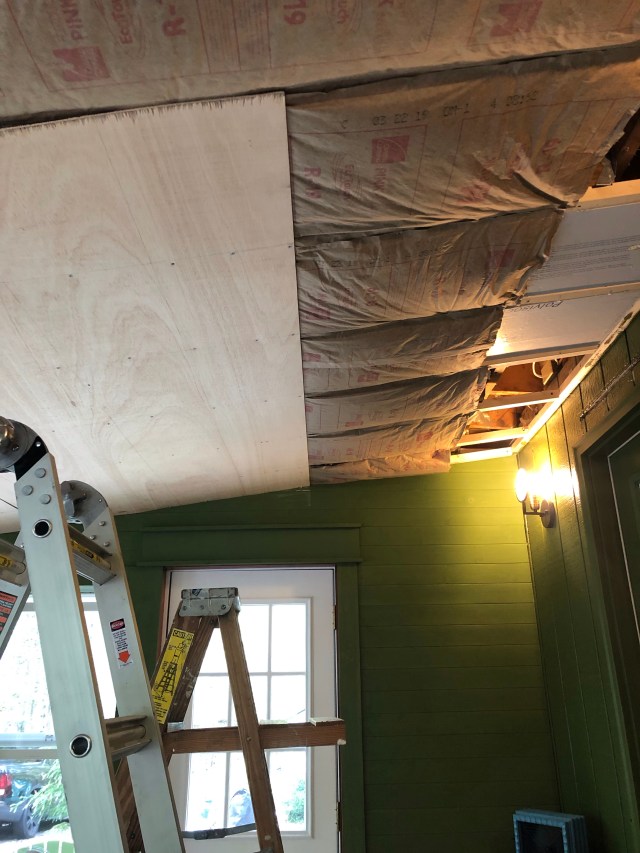
The next step involves applying a thin layer of plywood atop the insulation. This gives us something to which we can nail the hardwood planks. Each sheet of plywood gets screwed into place along the ceiling beams which support the roof.

We moved the electrical box to the ideal location for our vintage chandelier (more on that soon!). It was a little tricky, cutting around the junction box! In fact, installing the plywood was ALL very tricky, since the sheets are larger and we had to hold them overhead while we screwed them into the ceiling joists. It was definitely a 2 person job!!
As you can see, there was some unexpected trimming that had to be done from time to time, so we could get just the right fit.

Finally, we could begin the process of installing the wood planks on the ceiling. The process was identical to what we did on the floor, but everything had to be done with arms above our heads! You might notice the planks run in the opposite direction from the planks on the floor. This is because the wood should run across the ceiling beams, just like the flooring needed to be installed across the floor joists.
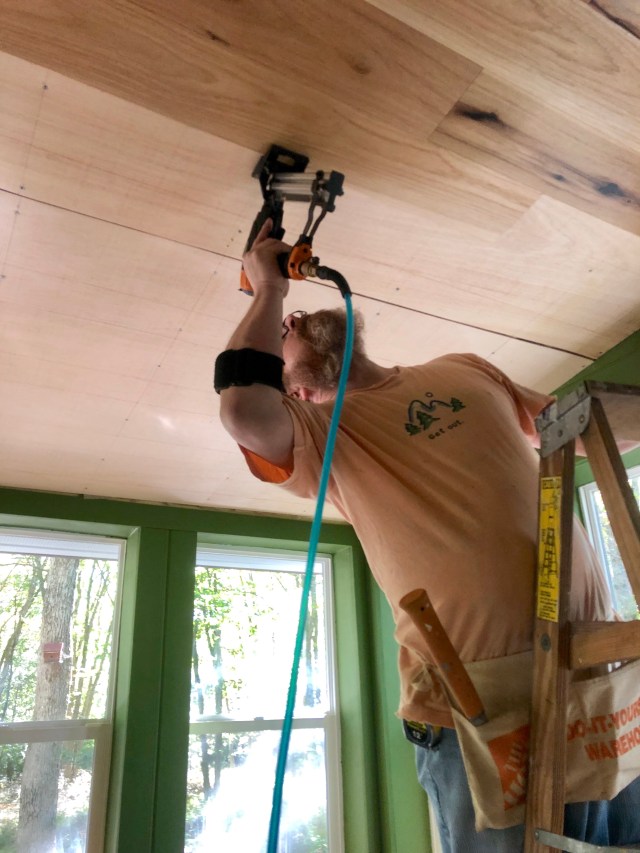
Installing wood on the ceiling, definitely adds quite a bit of neck and shoulder strain!

My husband straddles two ladders as he installs hardwood planks on the ceiling in the sunroom at The Shack.

The final step is to install the wood trim around the perimeter of the ceiling and then caulk any gaps for insulation purposes. It all turned out beautifully, but we’re glad to see the end of the ceiling installation in the sunroom at The Shack!
Up next is the lighting for our sunroom at The Shack. After that, it’s just the window treatments, area rug, furniture and finishing touches. We’re getting closer and closer to completing our renovations on this portion of our little vacation home in the Poconos!
Until next time, make sure to like Robinson Interiors on Facebook, Instagram, Pinterest, and Twitter, and DO stay tuned for future posts about my work, travels, and design inspirations, not to mention tips and ideas for updating your own home!
 Click on this image to be taken directly to my website for more information about Robinson Interiors.
