Last time we focused on the installation of the hardwood floors in the sunroom at The Shack. That means today we can finally begin to install all the beautiful green stained cedar wood trim and cedar wood plank walls!

A LOT of staining has been going on, in preparation for installing the walls and casing in the sunroom at The Shack. I’m so glad I absolutely love this particular shade of green, because I’ve been seeing a TON of it during the process of painting two coats of stain on ALL that cedar!
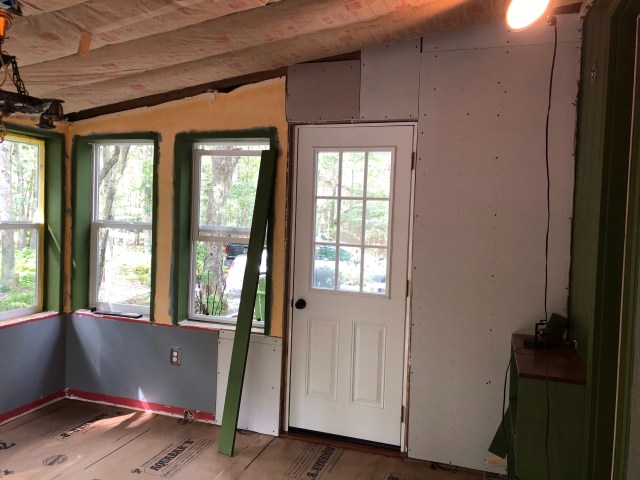

Here you can see we’ve installed the door casing and baseboards (which sit atop the hardwood floors), and now we are just beginning to install the window apron board, which spans the two windows. We’re planning to re-use the brown wood stained windowsills that were original to the room…one of the only items to remain!

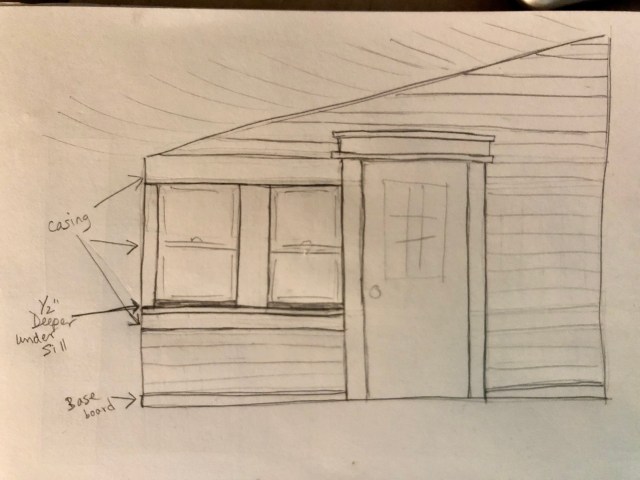
Once the top and bottom frame is placed around each cluster of windows, we can fill the vertical spaces in between each window and even in the corners. Each piece is carefully thought out and custom cut before installing.

Finally the stained cedar V-groove planks can be applied. It’s an exciting day indeed! You can see from the above photo how the wall planks are not quite as thick as the baseboards and window apron which create a sort of frame for the walls. There’s s a lot of dimension to the various wood, which creates a lot of textural interest!

Here you can see the relationship between the V-groove wall planks and the casing. This shows how we chose to proceed in the sequence of installation. The wall planks butt up against the vertical door casing and sit atop the much thicker baseboards.

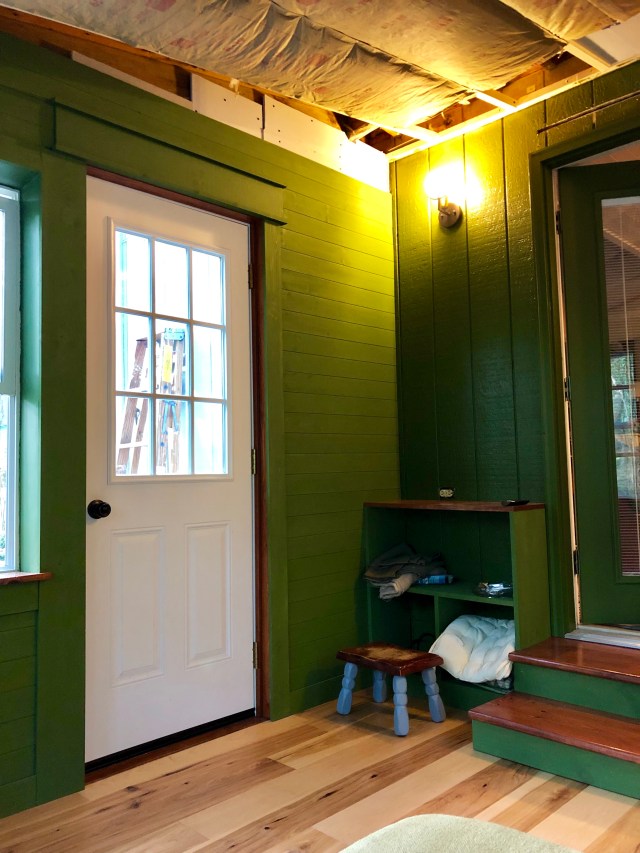
Nearly finished with this wall on the left! It’s actually starting to look like a sunroom again.

In this image you can see the wide header we installed above the entry door. Custom details like this add so much to the quality look of a room!

We’re getting so close to having finished walls and trim in the sunroom at The Shack. I wish you could smell the pungent fragrance of the cedar in the room…it’s glorious!
I think I’ll leave you here, but next time we’ll begin the arduous task of installing the wood on the ceiling. This is not a job we’ve been looking forward to doing, but I think having wood on the ceiling will be so wonderful, don’t you?
Until next time, make sure to like Robinson Interiors on Facebook, Instagram, Pinterest, and Twitter, and DO stay tuned for future posts about my work, travels, and design inspirations, not to mention tips and ideas for updating your own home!
 Click on this image to be taken directly to my website for more information about Robinson Interiors.
