Welcome back to my series on renovating my family’s vacation home in the Pennsylvania Pocono Mountains. We’re currently working on the sunroom. This room originally had mustard yellow sponge-painted walls with slate blue-grey woodwork. It serves as the main entrance to the home and in the future will serve as a cigar smoking room for my husband, year round.
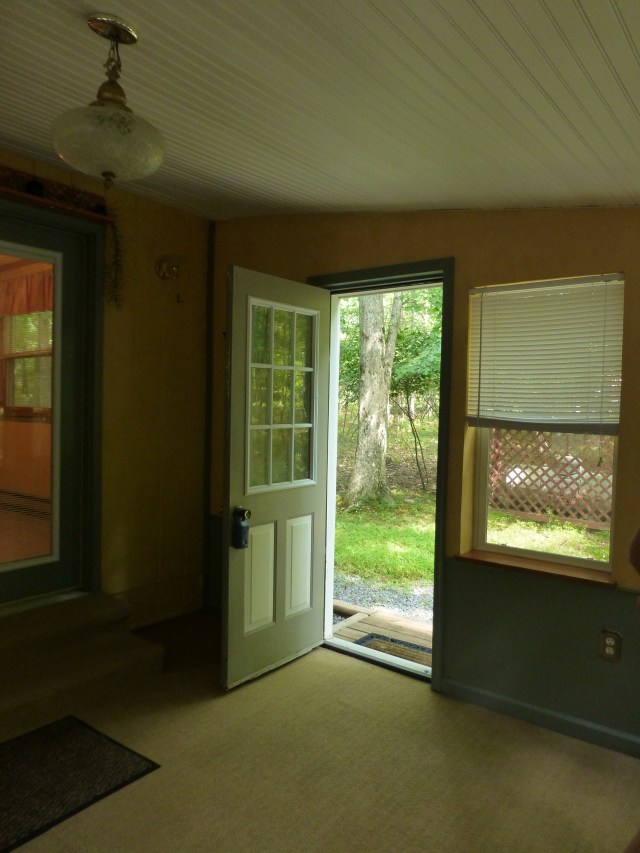
BEFORE: Plastic beadboard ceilings accompany brown indoor/outdoor carpeting and mustard yellow sponge-painted walls. Plastic mini-blinds adorn the windows.
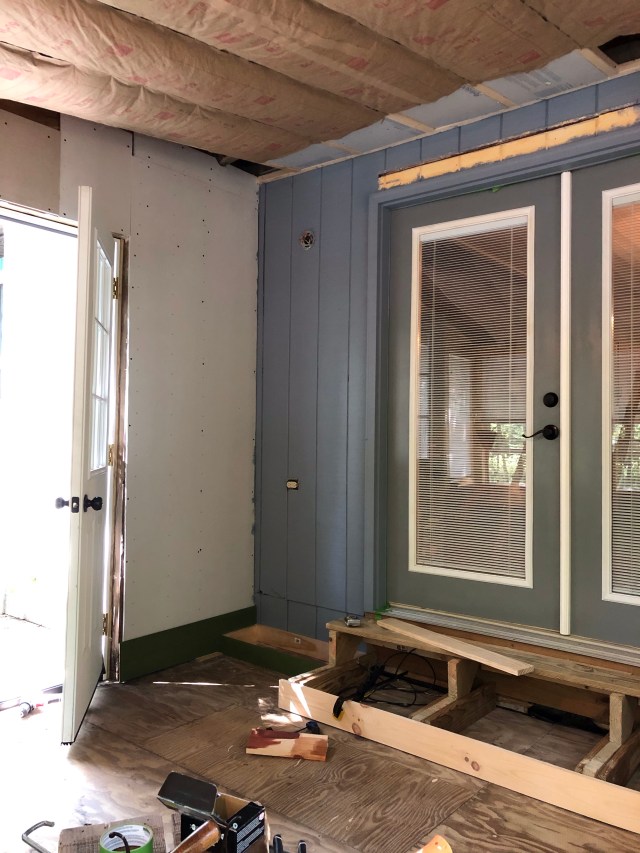
One of the first things we did was repair some water leaks, and remove all the existing trim and casing. We also replaced both exterior doors.

Using a dark grey primer will allow full depth of color when we paint the top coat of dark green.
We used a dark greyscale primer on the existing wall surrounding the French doors. This wall is clad in the original exterior siding.
And we followed the grayscale primer with two coats of the dark Basque Green Paint by Sherwin Williams.

Along with drywall repairs following the water problems, we ended up entirely replacing the extra wide steps leading up into the main part of the home.

The original steps were mismatched boards and not exactly level.

My talented husband joined new pine planks to create the extra long treads we needed. He even built new risers and stringers too!
Next, the French doors were primed and painted.
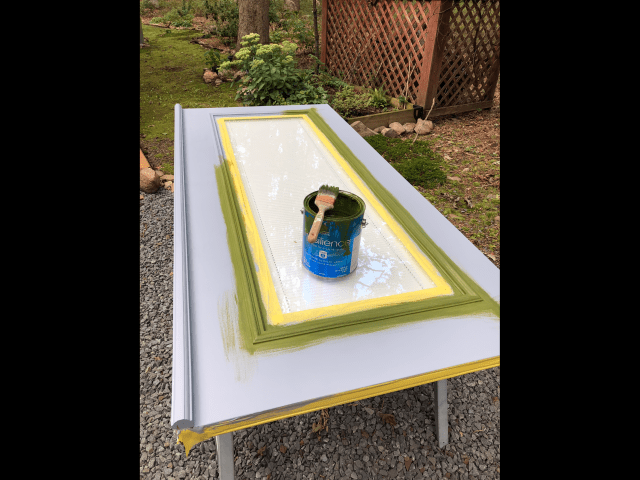
Again, we used a quality greyscale primer first, then two coats of Basque Green satin paint from Sherwin Williams.
Next we began priming and painting the inside of the window frames and any other areas that wouldn’t eventually be covered with cedar planks or casing.

Silvia grudgingly tries to nap on the space formerly filled with an ample windowsill.
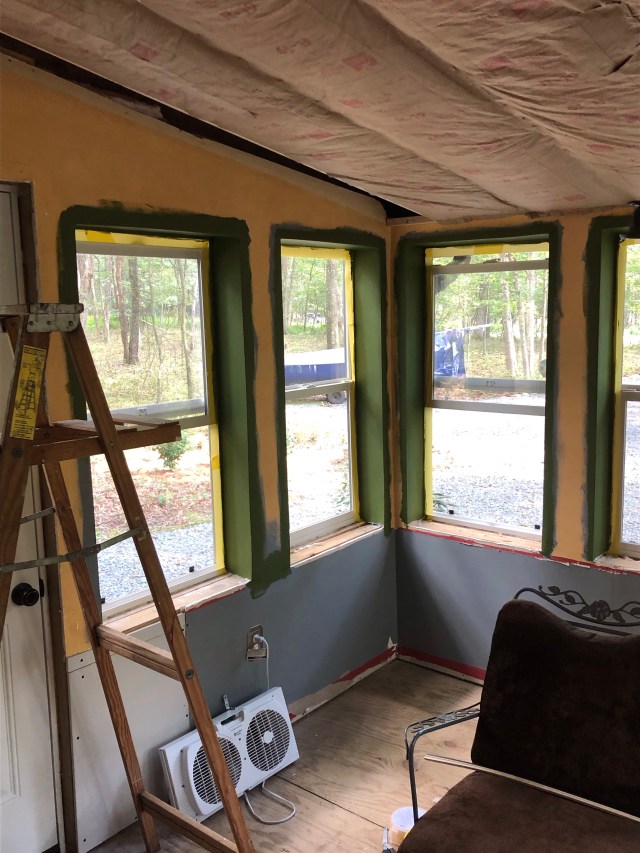
Green paint adorns the window wells and repairs have been made to the drywall surrounding the door.
Of course, all the cedar wood we are going to install on the wall surfaces and trim still needs to be painted with two coats of green opaque stain.

We chose opaque stain, since it will be absorbed by the wood, rather than float on top. We definitely want the texture and grain of the cedar to come through and I like that the wood will have a matte finish.

So much staining to do!!
And now the half bookcases for either side of the French Doors could be constructed. Here are the original drawings I supplied to my husband:
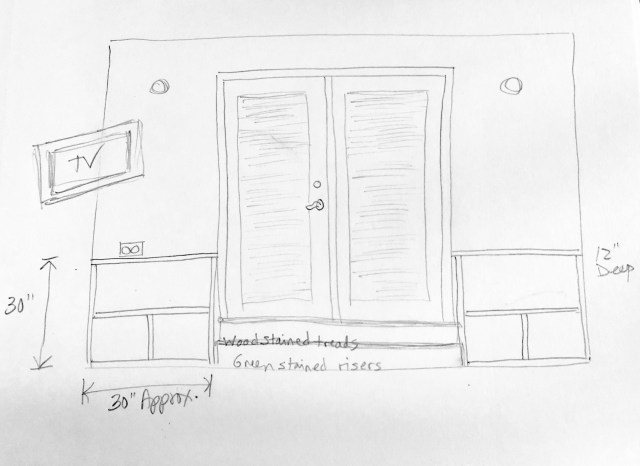
We also began discussing the possibility of including a small television to the space! Why not add another level of enjoyment to this woodsy room?

And after staining and cutting the wood we installed the simple bookcases, before moving on to the flooring and ceiling.
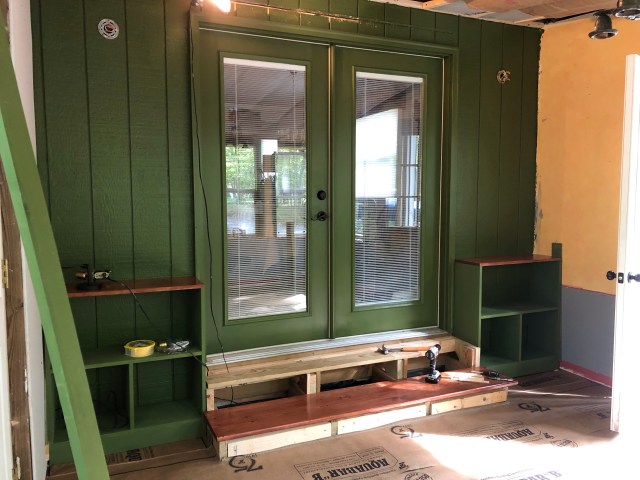
Here you can see the newly installed bookcases which flank the French doors along with one of the extra long stained wood treads on our new steps which are still under construction.
Whew! There’s still a lot more work to do…but now we can finally begin the process of installing the beautiful Hickory Wood on the floors and ceiling before moving on to the stained green wall planks and all the wood casing and trim. Of course, lighting and window treatments will eventually need to be addressed, along with a new area rug, furniture, and accessories.
Until next time, make sure to like Robinson Interiors on Facebook, Instagram, Pinterest, and Twitter, and DO stay tuned for future posts about my work, travels, and design inspirations, not to mention tips and ideas for updating your own home!
 Click on this image to be taken directly to my website for more information about Robinson Interiors.
