Welcome back! On today’s agenda is a discussion of interior doors. I’ve already shared with you about how we changed out the wood trim around all the doors and windows, and that we even replaced the baseboards and ceiling moldings. That has made such a huge difference at The Shack! However, the original interior doors going into all the bedrooms, bathrooms and closets are still pretty awful. They are all the original 1980’s hollow-core plastic laminated, fake wood grain, icky doors. Can you tell I really don’t like them much?
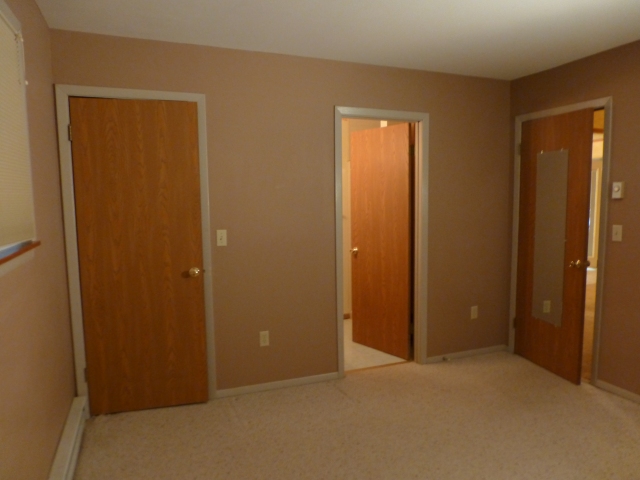
BEFORE: Here’s a photo taken inside the main floor guest bedroom at The Shack. This shot gives a good view of the old shell door casing which outlines the ugly plastic laminated doors.
Our intention is to switch out these doors for wonderful antique versions…wouldn’t that be wonderful? Rustic, solid-wood doors that scream quality and have a sense of history…that would be so nice!
Replacing interior doors can be tricky though. It’s somewhat difficult to get them all plumb and fitting the right way inside of their frames. When a house is first built, the doors come pre-assembled inside of the jambs or frames. Then the whole thing is inserted into the wall opening and afterwards the drywall is applied. This way is much easier than trying to fit a door (or slab) into an existing opening. Still, that is our goal someday: to replace all the interior doors with better quality and much more attractive examples.
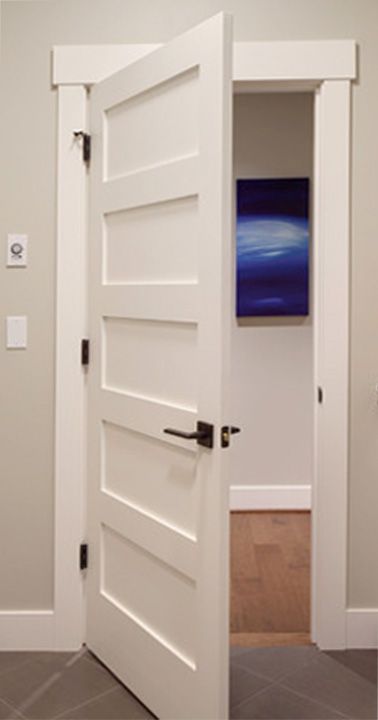
In this inspiration photo, found on Pinterest, a nice solid wood door looks substantial and elegant, within its simple wood trim (much like the trim we applied at The Shack).
You can visit the above image by clicking here.
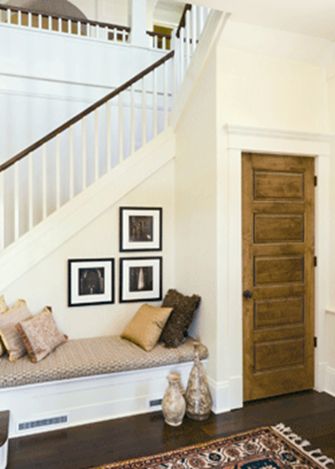
This photo shows a stained wood interior door. I like it too, especially for a rustic mountain house, like ours!
https://www.pinterest.com/pin/237424211577518278/
It will be awhile before we can add similar doors to The Shack. Especially since I want to use antique or vintage examples, and that will take some time to find. We have so many doors to replace and would want them all to be in a similar style. Also, the cost of all those doors starts to add up quickly…and my budget is limited at the moment!
So I came up with the alternative of painting the ugly, plastickey faux-wood, in the meantime. I’ve been using white milk paint for all the trim at The Shack, and I love how it’s turning out. But I’ve decided I’d like to paint the doors dark, which makes them more furniture-like within their new white wood trim.
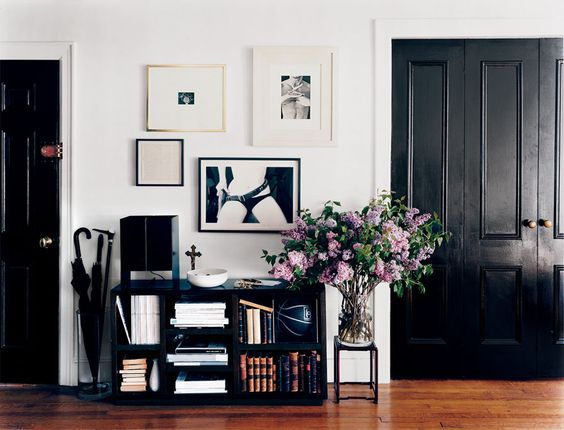
The black doors in this photo look so sleek and interesting, outlined with the crisp white casing. The doors take on a furniture-like quality when highlighted in this way.
To visit the source for the above photo, click here.
So, the only thing left to do is start painting. I turned, once again, to Miss Mustard Seed’s Milk Paint for chalky black paint. After a good washing and light sanding, I primed the laminated wood-grain doors with Kilz primer for good adhesion on the laminated surface.
Then I mixed up some Miss Mustard Seed’s Milk Paint in the ‘Typewriter’ color (it starts out in powdered form and you just add water) and added in a little ‘bonding agent’ to make sure it would stick really well. Then I applied a generous coat to the primed door. When it’s wet the paint looks nice and black, then dries to a chalky gray color which has a lot of texture.
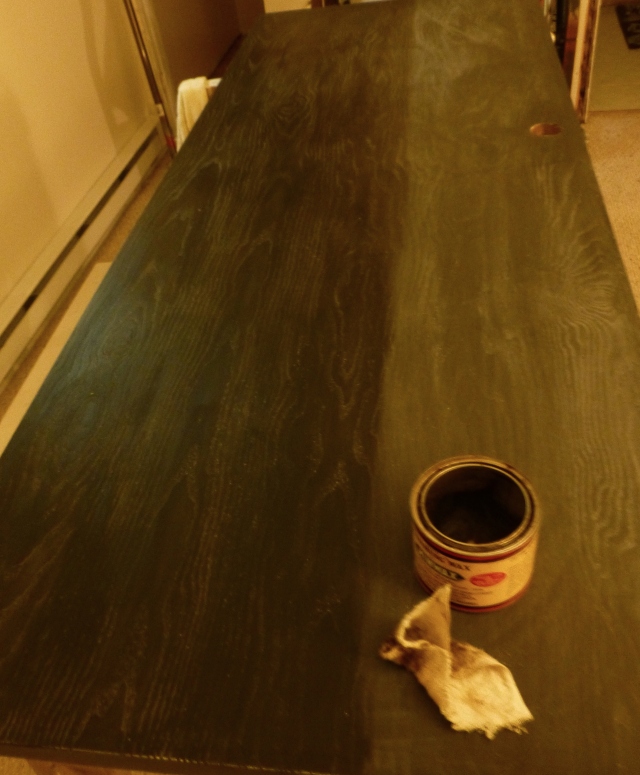
In this photo, you can see that I’ve painted the door in chalky black milk paint on the right. I then lightly sanded the dried paint, to expose a little more of the textured faux wood grain. Finally, a coat of Paste Wax is applied as a top finish. The darker half of the door, on the left, is showing how the finish darkens after wax is applied with a soft rag. It’s like night and day after you wipe that wax on! The final step is to buff out the wax after it has a chance to dry. This gives the finish a nice sheen which turns out so pretty!
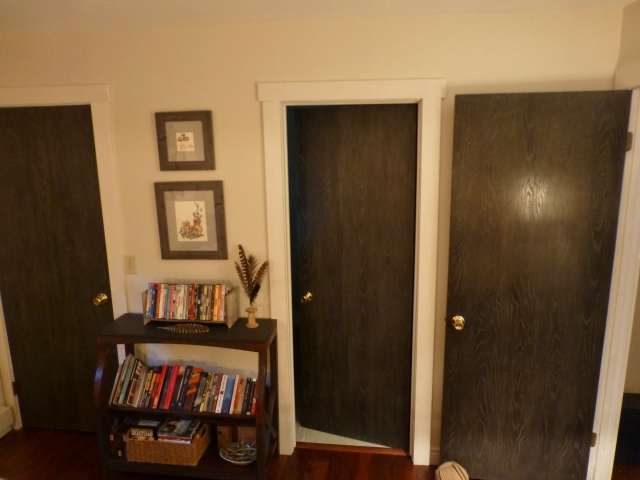
AFTER: Here you can see the same three doors with their new multi-process finish: After sanding, cleaning and priming, a coat of black Milk Paint was applied, then sanded lightly again, and finally waxed and buffed. It’s a lot of work, but I think the new finish highlights the wood-grain texture and makes the doors look so much better, don’t you?
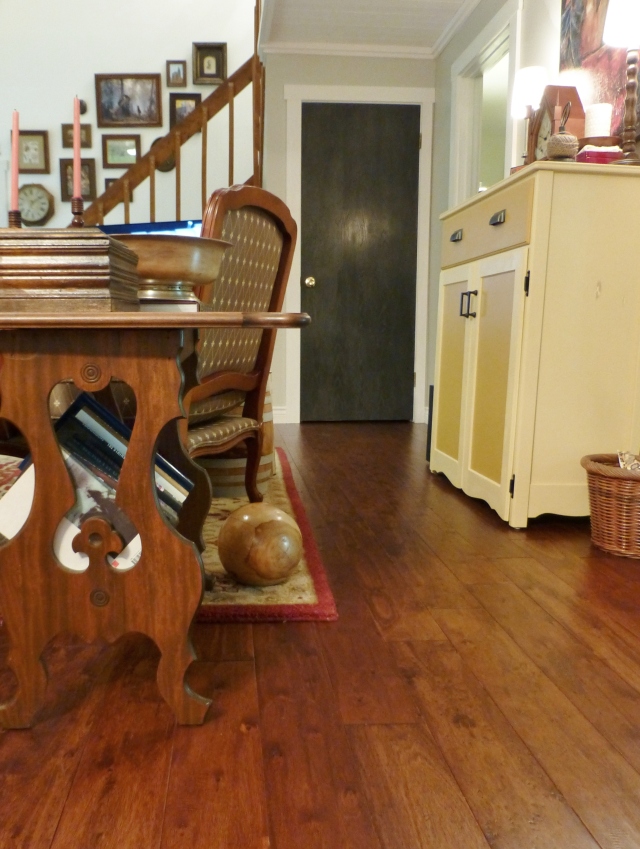
AFTER: Here’s another shot that shows the freshly painted black doors at The Shack. What an improvement from that 1980’s fake wood!
Thanks for checking in with me today. Things are really starting to come along at The Shack. Until next time, make sure to like Robinson Interiors on Facebook, Instagram, Pinterest, and Twitter, and DO stay tuned for future updates on The Shack!
Click on this image to be taken directly to my website for more information on Robinson Interiors.

