Well, it’s finally time to get to work. In previous posts, we’ve selected paint colors and decided how to remediate that ugly popcorn, cottage cheese ceiling in the dining area. We’ve even decided to replace and paint all the new trim with ultra matte Milk Paint.

One of the first steps is to remove all the existing trim work. Here, you can see we have dismatled a portion of the wood ceiling trim, and the casing from around the doors and window. We’ve also begun spackling any cracks in the drywall and repairing nail-pops, etc. By the way, when I say ‘we‘ I mean, my dear husband…he’s so awesome!
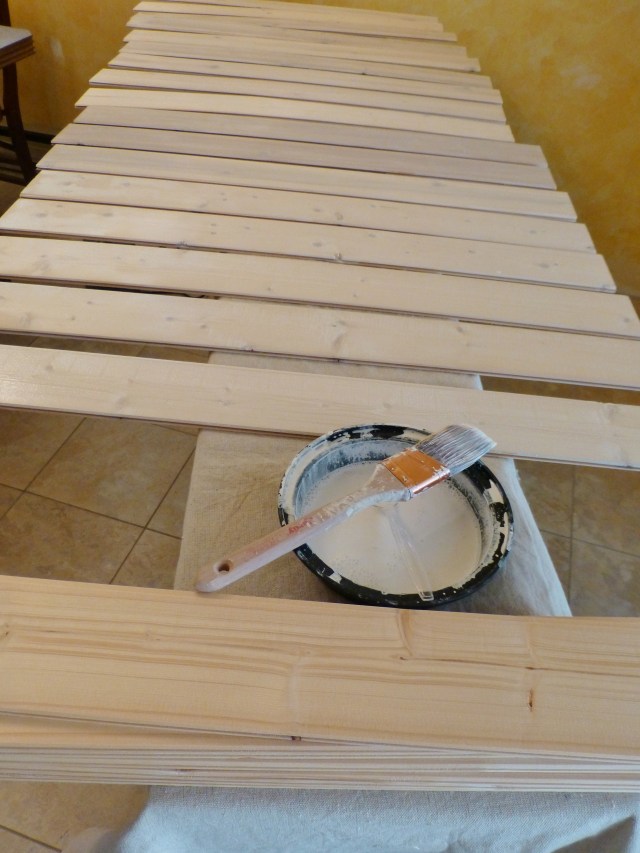
While my spouse is doing prep work on the walls and ceilings, I begin the arduous process of applying milk paint to the ‘million-and-one’ wooden planks which will eventually be applied to the dining room ceiling. Here you can see the V groove pine planks we’ve chosen, to use on the ceiling. In this image, many of the planks are shown with one coat of milk paint. The first coat is always very sheer and soaks down into the un-finished wood. It’s the second coat where you get the best opacity and color.
Here’s a link to the inexpensive V-groove paneling, from Lowes which we’re using for the dining area ceiling at The Shack. http://www.lowes.com/pd/Empire-Company-3-5625-in-x-2-67-ft-V-Groove-Raw-Pine-Wood-Wainscot-Wall-Panel/3799131
It’s very affordable and the boards are tongue and grooved together, just like hardwood flooring or beadboard. It’s a lot of work to install, but totally worth it!

Here is my dear husband, beginning to apply primer on all the walls. You can see what huge difference there is. So happy to be getting rid of all that yellow sponge paint!
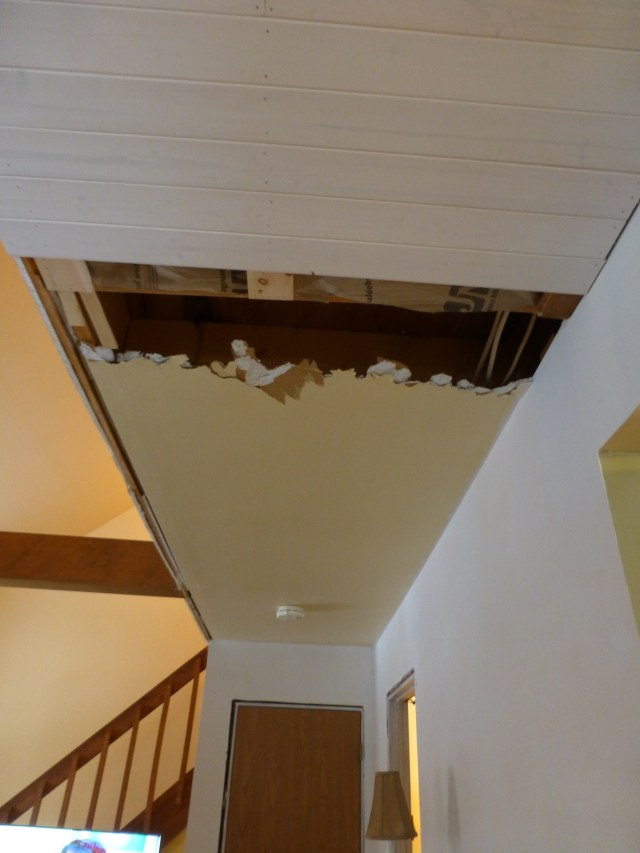
We had to level the ceiling with furring strips as we went. And here, under the upstairs walkway, you can see that we had to remove some drywall as well. It was important to try and get everything level, so there wouldn’t be noticeable crooked-ness after the rest of the trim and casing goes in. The process of leveling and applying the tongue and groove planks to the ceiling was very time-consuming, but also worth it!

And afterwards, that yucky old ceiling is all hidden away, and the new, milk painted planks add so much wonderful character!! By the way, notice that ugly plastic faux-woodgrain door on the closet in the above photo? These doors are throughout the house, and I plan to change them out eventually. It would be great to find antique wooden doors, but that’s tricky, to find enough doors in the right sizes for an entire house. It’s definitely something I’m keeping in the back of my mind!

And here’s the entire ceiling under the upstairs walkway, and going into the dining area, with the planks installed. It looks amazing! I’m so happy with how it turned out. Installing this tongue-and-groove product is a lot like installing hardwood floors, but upside down. It definitely took two people to install–my husband and I would fit each board into place (which can be tricky, since the pine boards are not terribly thick and sometimes the tongues didn’t fit well into the grooves), then I would hold it, while he used the nail-gun to affix each plank. We used over 1,000 nails in this ceiling! Soon, we’ll finish priming and painting the rest of the walls in the main area. That two story slanted ceiling will be tricky! Then we can trim everything out with crown molding and casing. The baseboards will be one of the last things, after the new floors are installed.
The work that you see in this post, took quite some time to complete. Between removing the original trim & casing, painting all the V-groove planks twice, priming the walls, leveling the ceiling and the two person job of installing the planks, there’s a lot of labor involved. Plus we were doing it all ourselves and only on the weekends. Still, it’s so extremely rewarding to see the fruits of your labor, and when it’s all said and done, it’s SOOO much better than that cottage cheese!
Stay tuned for more progress on The Shack in future posts! Until next time, make sure to like Robinson Interiors on Facebook, Instagram, Pinterest, and Twitter, and DO stay tuned for future updates on The Shack!
Click on this image to be taken directly to my website for more information on Robinson Interiors.


Kristine, thanks for sharing the transformational journey of The Shack! It’s so fun to see the progress! All of that work will come with a huge reward. Can’t wait to see your next post!
Thanks for commenting, Sharon! This is such a fun project–the ‘Before’ is so terrible, so the ‘Afters’ are pretty dramatic. I’m enjoying the process and am eager to share!