Welcome back to my long-running series about renovations to our little vacation home in the Poconos. The Shack, as we lovingly refer to it, is coming right along. Today I want to show you some more DIY furniture upcycling…this time in the dining area.
You may recall that we updated the dining area of The Shack, by covering up the ‘cottage cheese ceiling’ with lovely pine planks. If you missed it, you can visit that post by clicking here: Preparing to Paint and Install a Plank Ceiling
Those were the beginnings of our renovations to the dining area. We also installed our beautiful hardwood floors and I painted a thrift store bookcase to go in that space as well.
Since The Shack features an open floor plan, we definitely needed some storage in the dining area, and a bit of serving space is always nice to have near the table too! So I began searching for a large piece of furniture to accommodate those needs. I wanted the piece to fill the entire wall between the dining room and kitchen, which is about six and a half feet long.
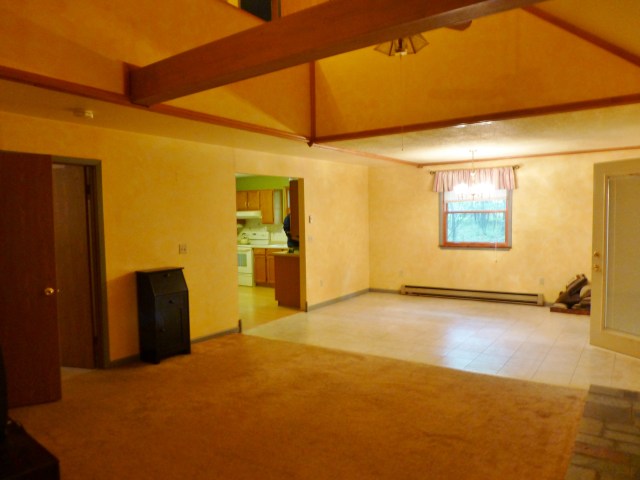
You may remember that BEFORE, the dining area at The Shack looked like this: peel and stick linoleum tiles and gold sponge-painted walls, beneath the cottage-cheese ceiling. I’m looking for a sideboard or dresser to fill the space in the corner to the right of the kitchen opening.
So I visited my local thrift store once again and found a terrific vintage dresser. I’m very sad I failed to take a decent before photo of the dresser before I began the process of cleaning, sanding and painting it, but at least I have some progress photos to share.
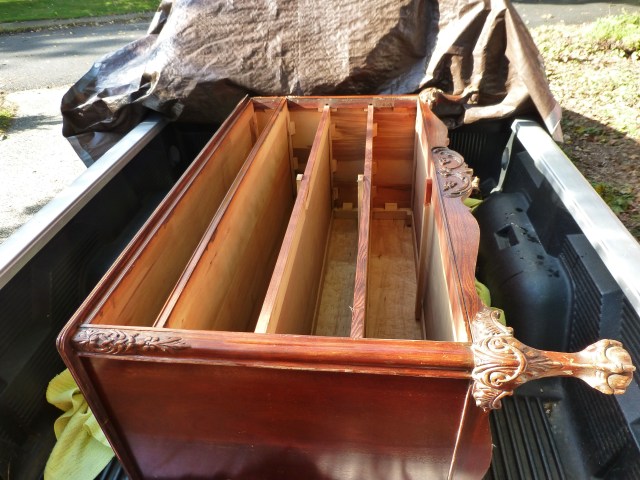
Here’s the body of the dresser, without its drawers, laying in the back of my pickup truck. As you can see, the dresser has some terrific carved details, like claw and ball feet, and rounded corners with carved details. In fact, the dresser was just a bit too formal for the look I’m going for at The Shack, so I decided right away that I would paint it.
Before you get all upset at my choice to paint this vintage dresser, you should know that it was in pretty rough condition.

The finish on this vintage dresser was pretty banged up and rough. So I didn’t feel too bad about my plan to paint this piece. I want it to be light and bright, while retaining a vintage rustic appearance in spite of the more formal carved details.

The extra wide drawers have a nice beaded edge detail and they feature pretty, gold hinged drawer pulls.
This dresser dates to around the 1940’s by my estimation. So it has that bold red-stained finish on it. My plan is to paint this entire piece white, for a fresh bright appearance, but that red stain is notorious for bleeding through almost ANY paint finish…even after priming.
So before doing anything else, I lightly sanded, then washed the dresser thoroughly. The red stain even bled onto my wet washcloth!! So I decided to seal the entire piece with a clear polyurethane before proceeding with my painted finishes. I didn’t want to go through all the work of painting this piece and have pink splotches show up through the white finish. Wouldn’t that be terrible?!
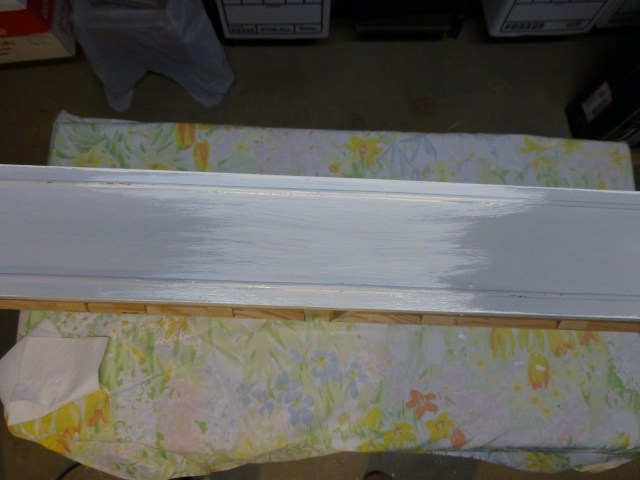
Of course, I like many of the other finishes at The Shack, I planned to use Miss Mustard Seed’s Milk Paint again for this piece of furniture. I want it to sort of match the bookcase I’d already painted at The Shack. You can read about that project by clicking here: Thrift Store Furniture DIY So I started by painting the drawers and put a coat of gray paint on first as an undercoat. That way, the grey will peek out a little when I sand and distress the dresser later. After painting the entire thing gray, I added 2 coats of ‘Ironstone’, which is a nice soft white in the Miss Mustard Seed’s Milk Paint line.

You can see I’ve painted all 4 drawers in this photo. Once they were painted, I sanded them back a little to give the impression of wear over the years and to highlight some of the details. Then I sealed them with a sturdy coat of Polyurethane.

Next, I began the same process with the body of the dresser. After painting, I went through the same process as the drawers, with sanding, then giving everything a good top coat sealer for durability.

AFTER: The painted dresser in the dining area at The Shack gets a ton of use. Nearly all the drawers are filled with board games and puzzles, so it’s very handy next to the dining table. As you can see, the white paint looks great on this large dresser and the rustic finish brings out some of the details.
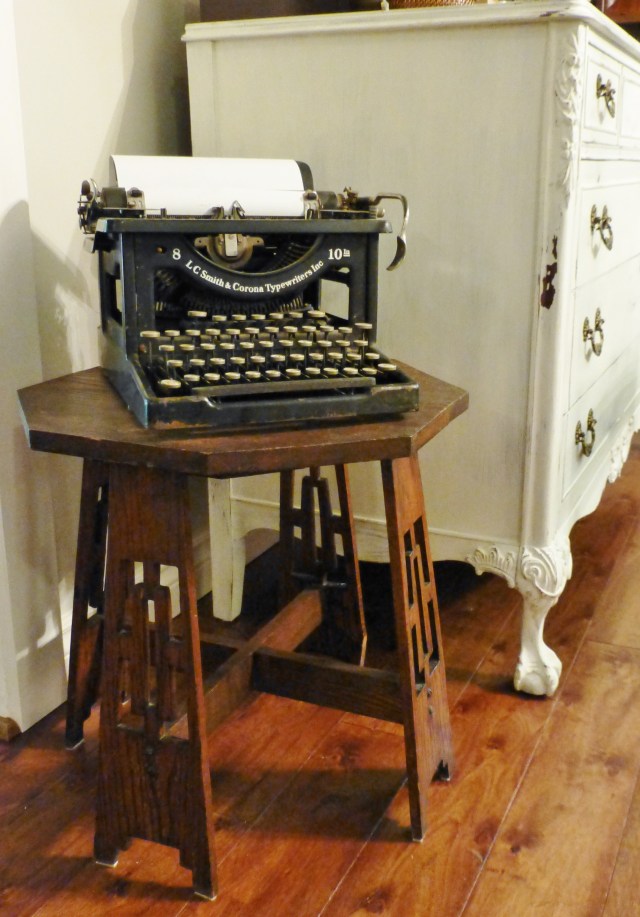
I added this terrific little Antique Oak Craftsman table with an old typewriter on it too. I just love little vintage details like this, don’t you? Behind the typewriter, you can see the distressing and crackling in the white milk painted finish of the dresser. Just perfect in my opinion!
Thanks again for following along with our progress at The Shack. There’s still a lot more to share with you, I hope you’ll stick around as I post the before and afters in our little Poconos mountain house. Until then, make sure to like Robinson Interiors on Facebook, Instagram, Pinterest, and Twitter, and DO stay tuned for future updates on The Shack!
Click on this image to be taken directly to my website for more information on Robinson Interiors.

