Welcome back to the series of posts on my teen son’s bedroom at The Shack. We’re getting so close to a big reveal…I can’t wait!!
Today I want to show you how we designed and installed our blue board and batten accent wall for behind Grady’s bed.

So here’s a sneak peek at the progress we’re making on Grady’s bedroom at The Shack. You can see we’ve installed some simple molding at the ceiling (white boards on 3 walls and blue on the accent wall), and some fresh new white window casing (which makes a huge difference on enlarging that window!). Everything looks so fresh and clean now that three walls are painted in Sherwin Williams Simple White. The contrasting blue accent wall is painted in Sherwin Williams Down Pour.
My above photo also shows plenty of boards which are being painted and prepped for our blue board and batten accent wall.
So obviously we needed to plan out the board and batten wall and there was a lot of discussion about the size of the grid and how many squares we wanted, etc. In the end, we decided to let the location of studs guide our board installation. I also decided that I only wanted one horizontal board, in addition to the ceiling molding and the baseboard. I didn’t want the wall to be overly busy and I wanted to elongate and make the ceilings look taller.

The photo from Thrifty Decor Chick shows an example of a board and batten wall with a single horizontal board. This is very similar to what I want for Grady’s accent wall.
To visit this image on my Mountain House Pinterest board, just click on this link.
So, of course, after painting the wall and all those boards, we measured and roughly figured out our spacing. My super smart and handy husband decided to install the horizontal pieces first for added support. That way the long boards would be installed in a stud and not just floating out there in between the studs.
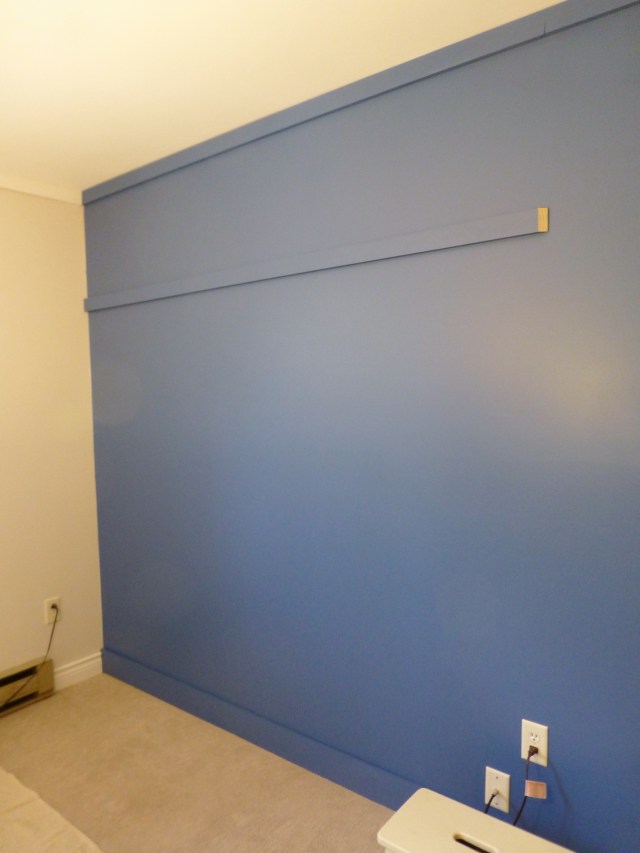
Here you can see we have the top ceiling trim board and the baseboard trim board installed first. Then we proceeded with the board and batten wall by applying the horizontal board next. The board is not quite long enough to span the whole wall, so my husband carpenter angled the cut for a sturdy mitered joint that will hide very well once completed.
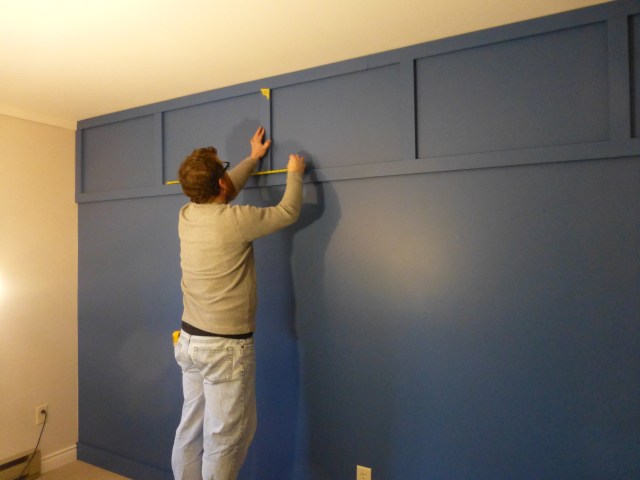
Next the top vertical boards are applied. We placed them all temporarily on the wall first, and made sure the position was right before permanently attaching them. There was plenty of fine tuning and adjustments before we committed to the final placement of these upright boards.

And finally, you can see that we have all the boards permanently attached and have patched and spackled all the joints and nail holes. It kind of appears as if the wall has a bad case of acne, doesn’t it? Maybe I should leave it this way, since it’s a teen boy’s bedroom!

Silvia is annoyed that all this work on Grady’s Teen Bedroom is taking so very long. She’s ready for the room to be finished!! I’m happy to say, we’re nearly there. Once the final coat of paint goes on and all the trim gets caulked, we’ll be inserting all the furnishings. I can’t wait to show you!
There’s still a lot more to share with you, so I hope you’ll stick around as I post the before and afters in our little Poconos mountain house. Until then, make sure to like Robinson Interiors on Facebook, Instagram, Pinterest, and Twitter, and DO stay tuned for future updates on The Shack!
Click on this image to be taken directly to my website for more information on Robinson Interiors.

