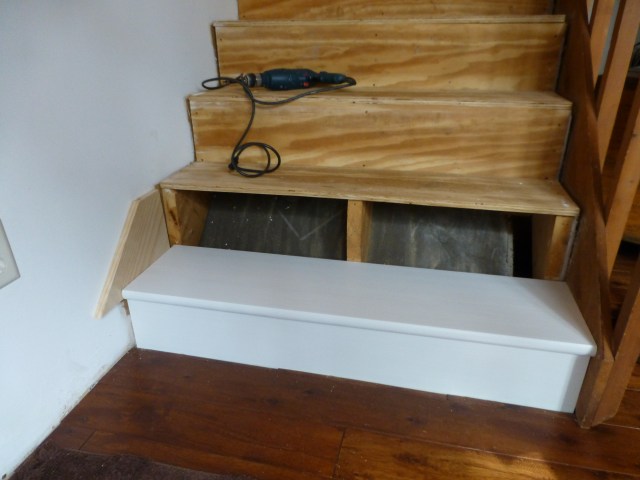
Now that we’ve decided to replace most of the stairs at The Shack, we jumped right into the project. The first part of the process was to remove some of the rough drywall separating the stairs from the railing, since we intend to go right over top of it.

In the above photo, you can see that we’ve removed the bulk of the drywall on the right side of the stairs at The Shack, in preparation for replacing the treads and risers. The wood you see on the steps here will be removed and replaced with new treads and risers.
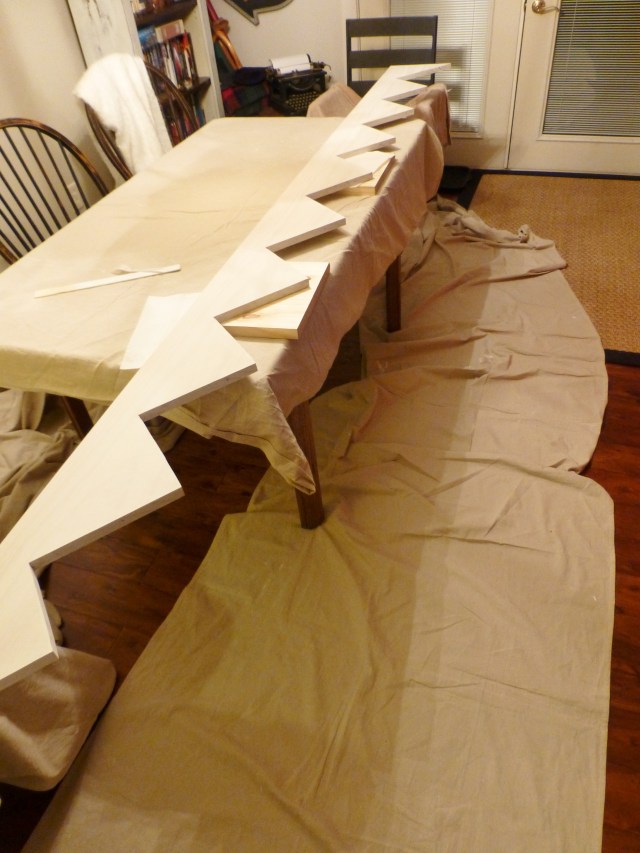
The next ‘step’ (pun intended) was to purchase and paint the boards for our new treads and risers (we primed and used two coats of semi-gloss white on both sides before installing them). Then each piece was cut to exact dimensions and custom fitted for each step. You can see in the above photo, that we used a spacer board on the left to simulate the depth of the skirt board we’ll also be installing. This long, zig-zagged board will slide down behind the left side of the treads and risers for a nice, tight fit.
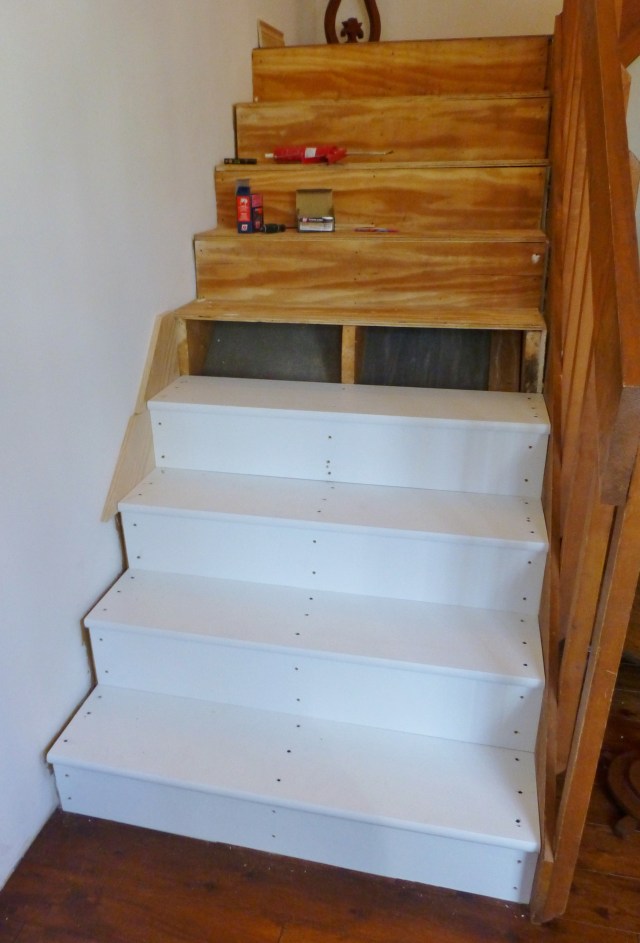
This process of installing each tread and riser takes a considerable amount of time (at least it does for my perfectionist spouse!). You can see we tackle them one at a time. This way, we’re able to actually use the stairs during the lengthy process…otherwise we’d have no way of accessing the bedrooms and bathroom on the second floor. Once all the steps are installed and very tightly screwed into place, each of those screw holes will get patched and painted over, before the carpet runner gets installed.
Using a cardboard template, my husband custom made this skirt board to fit each step (Yes, he is amazing!). This process was a little tricky, since there is some variation in the actual size of each tread and riser. Obviously, we primed and painted the skirt before installing it. This piece of the staircase goes in last, after all the treads and risers are in place.

Silvia, our Siberian cat, was super eager to help out with every part of this process!! She is so curious! Here, you can see we have the treads and risers installed, and the screw heads are all patched. We’ve also installed the skirt board on the left side. Now we can finally start thinking about our carpet runner. In this photo, I’m just getting ready to attach a nice, thick pad to go underneath the runner. It will get stapled into place and the new carpet will go on top.
One thing I will tell you, in case you’re considering a similar project of your own, is that the stair treads must be completely and very tightly screwed into place. If there’s the least little bit of movement, a very loud popping and creaking sound will occur each time someone walks up or down the steps. Trust me, it’s not pleasant! I believe some installers will actually place felt or some other such material underneath the treads to help with this problem. We figured it out, though and now we love our new stairs at The Shack. It makes such a difference to have solid, sturdy new steps.
We’re making great progress on the stairs at The Shack. Next time I’ll show you the carpet runner we chose and you’ll get to see the finished project. How exciting! Until then, make sure to like Robinson Interiors on Facebook, Instagram, Pinterest, and Twitter, and DO stay tuned for future updates on The Shack!

Click on this image to be taken directly to my website for more information on Robinson Interiors.

